

In the previous post, we had a look on how to write a Kotlin script to automatically write a README that dynamically aggregates various data sources.
In this follow-up post, we will describe how to run this script through the use of GitHub Actions.
Yet another Continuous Integration tool
It has been some time since Hudson, now known as Jenkins, was the leading (only?) Continuous Integration server available on the market. The last years has seen an precambrian explosion of alternatives: Atlassian Bamboo, JetBrains TeamCity, Circle CI, GitLab, you name it. Some are on-premise, some are Cloud-based. Some offer CI, some add Continuous Delivery, or even Continuous Deployment. Some are Open Source, some are commercially licensed.
Not so long ago, GitHub recommended a third-party CI tool, Travis CI. GitHub and Travis stemmed from Ruby, so I wrote how to use the latter to build Java projects. In November 2019, GitHub launched its own out-of-the-box CI - GitHub Actions.
I wanted to check how GitHub actions compared to other alternatives. I already gave it a go to release Maven artifacts. This was a good occasion to deepen my understanding, with the help of a different use-case.
Introducing GitHub Actions
Different products use different configuration files.
GitLab uses a .gitlab-ci.yml file located at the root of the repository.
Travis CI reads a .travis.yml file, also at the root;
while Jenkins prefers a Jenkinsfile.
Likewise, GitHub Actions uses YAMLs file.
Their location is a .github/workflows folder.
There can be more than one workflow defined for a project.
The model doesn’t reuse the semantics of any of the alternatives above, but the concepts are quite similar. A rough sample looks like the following:

Things I learned along the way
I learned a couple of things about GitHub Actions while I developed the profile-updating script. Here are they, in no particular order.
Testing requires uploading
GitHub actions offers no way to run locally. Thus, every change that requires testing also requires to commit and to push. As you can imagine, the feedback loop is quite long. This is not specific to GitHub Actions, but is common across all Cloud tools.
I mentioned this on Twitter:
user @joschi83 showed me the nektos/act community-led project.
It requires Docker.
On OSX, you can install it via Homebrew.
I found an issue, though.
One of the steps installs SDKMan, which requires unzip:
the used Docker image doesn’t provide the unzip utility.
The act utility offers an option to use another image.
But the one that emulates the GitHub environment is more than 18Gb in size, which is a bit much…
I must admit I’m too lazy to create an Ubuntu image with unzip on top, so I didn’t test locally.
Pre-defined actions
A step has a run property that can run a shell command.
The command can actually run pretty anything, since a previous step might have installed other utilities e.g. Python, Node, Java, etc.
A step can also reference an action.
An action is a reusable code snippet.
For example, the setup-java GitHub Action allows to install the desired Java version.
- name: Check out repository        (1)
uses: actions/checkout@v2 (2)| 1 | Step’s name |
| 2 | Action to use |
GitHub provides some actions out-of-the-box, while community members provide others. The ad-m/github-push-action project defines an action to… push to Github. For the record, it uses a Node.js runtime to achieve that, but you can publish your own using the stack you’re most comfortable with.
Actions may allow for (or require) parameters. For example, one needs to choose the Java version to install:
- name: Install JDK
  uses: actions/setup-java@v1
  with:
java-version: '14' (1)| 1 | Parameter of the action |
Environnement variables
One of the biggest issues I faced was that environment variables set by the command-line in one step are not set on later steps. It took me a long time to realize this, because I naively assumed this would be the case.
Environment variables belong to a scope. One can define them in different scopes: workflow, job, and step. A scope has access to environment variables set at a parent scope e.g. step can access job, but not the other way around.
It’s possible to make an environment variable accessible to other steps down the job via a dedicated command.
- name: Install SDKMan
  run: |
    chmod u+x install-sdkman
    ./install-sdkman
    echo ::set-env name=SDKMAN_DIR::$(echo $HOME/.sdkman)                  (1)
- name: Install Kotlin Scripting
  run: |
    . $SDKMAN_DIR/bin/sdkman-init.sh
    sdk install kotlin
echo ::add-path::$(echo $SDKMAN_DIR/candidates/kotlin/current/bin) (2)| 1 | Set the SDKMAN_DIR env variable |
| 2 | Use it |
The output of a previous step can also source environment variables.
- name: Get current time
  uses: gerred/actions/current-time@master
  id: current-time                                      (1) (2)
- name: Update README
  env:
TIMESTAMP: ${{ "{{ steps.current-time.outputs.time" }}}} (3)| 1 | Output a result |
| 2 | ID is mandatory for reference purpose |
| 3 | Source the TIMESTAMP from the current-time step |
Secrets
Some of the data cannot be written in the YAML workflow file. In general, they are authentication-related e.g. passwords, access tokens, etc. You need to handle them as secrets.
Similar tools I’ve used in the past, namely Jenkins, Travis and GitLab, allow to set secret key-value pairs in the GUI. The pipeline allows to reference the key, and get the secret value. GitHub Actions is by no means different. It’s accessible under the menu.
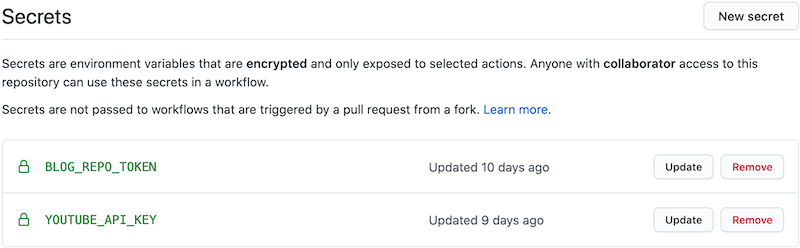
There’s a slight difference with other tools: one can update the value.
Also, note that there’s an implicit GITHUB_TOKEN.
It allows to manage the repository that launched the workflow.
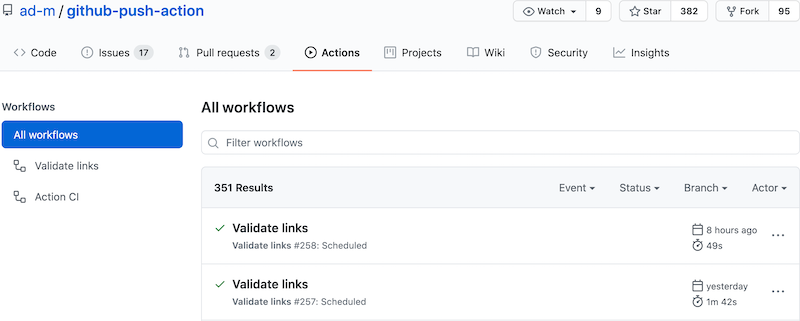
Starting the workflow
You can start the workflow in a couple of ways.
- There’s no "manual" trigger by default.
Hence, one needs add it explicitly if needed, via
workflow_dispatch:on: workflow_dispatch:It’s useful for testing purposes.
- You can schedule the workflow to run at regular intervals.
A cron expression allows to configure the interval.
on:
  schedule:
    - cron:  '47 1 * * *'
In general, it’s a bad idea to schedule jobs at regular intervals on shared infrastructure as they will compete for computing resources. At least, you shouldn’t set the cron on the hour. Even better, it’s advised to change the cron expression at each run, so that there’s a bit of jitter around the time of the next run.
It should theoretically be possible to update the YAML to change the cron expression as part of the workflow. But I’m lazy, and the benefits are low, so I didn’t follow up on this.
- Last but not least, a push on specific branches can trigger the workflow.
This is actually the "standard" way.
on:
  push:
    branches:
      - master
My workflow
The workflow file is a bit long, but you can check it on GitHub (obviously). Steps are the following:
- Checkout the repo
- Install JDK 14
- Fetch SDKMan install script
- Execute SDKMan install script
- Install Kotlin scripting via SDKMan
- Get the current time
- Update the
README - Commit the changes
- Push
| Though a push triggers the workflow, a push from inside the workflow doesn’t trigger it again. |
Conclusion
The whole project took a couple of days, and was a fun ride. I learned a couple of things along the way. I hope this post can benefit you as well.
The complete source code for this post can be found on GitHub.